How to Wax at Home: A Beginner's Step-by-Step Guide

Related Posts
-
Waxing Salon Marketing Strategy: How to Attract, Convert & Retain Clients in 2026
Rewritten from: _blogs_waxing_101_top_10_faq_on_waxing_franchise_o.md (DIFFERENTIATE → Node 19: Marketing Waxing S...
-
Marketing Waxing Services: The Complete Guide to Social Media, Client Acquisition & Loyalty Programs
TL;DR / Executive Summary Social Media Is Not Optional — It's Your Biggest Revenue Channel: 85% of salons att...
-
Advanced Waxing Certification & Professional Development: The Definitive Career Guide for Estheticians
TL;DR / Executive Summary Certifications matter: Specialized waxing certification courses — beyond your base es...
-
The Esthetician's Guide to Severe Post-Wax Reactions: Skin Lifting, Burns & Pigmentation
Hello, WaxFam Pro. Let's talk about the four reactions that can end a client relationship overnight—and cost you your...
-
Folliculitis vs. Ingrown Hairs Post-Waxing: The Complete Prevention & Treatment Guide
Hello, WaxFam. The bump appeared 36 hours after the wax. Your client is staring at it in the mirror, concerned, and n...
-
Why Natural & Organic Hard Waxes Prevent Post-Waxing Pigmentation: An Esthetician's Guide
TL;DR: The Professional Verdict on PIH Prevention Post-inflammatory hyperpigmentation (PIH) is triggered by skin...
-
Why Estheticians Use Colored & Scented Hard Wax: The Pro's Safety & Performance Guide
TL;DR: The Quick Verdict Hard wax color is a professional tool — opaque pigments create visual contrast at the ...
-
Brazilian Wax Guide: Types, Benefits & Aftercare Tips for Smooth Skin
TL;DR: Key Facts at a Glance A Brazilian wax removes nearly all hair from the front, back, and everything in betwee...
-
The 72-Hour Post-Wax Survival Regimen: Your Recovery Blueprint
Hello, WaxFam Pro. Your male clients are booking more waxing services than ever—chests, backs, intimate areas. They’r...
-
The Science of Male Skin: Why Your Waxing Technique Must Be Different
Hello, WaxFam Pro. Let's cut to the chase: waxing male clients isn't just a "men's version" of a female service. It's...
-
Beyond the Beard: Precision Neckline and Facial Waxing for Modern Men
Hello, WaxFam Pro. Your chair isn't just for one gender. The modern male grooming market is a high-growth, high-value...
-
Manzilian Waxing Etiquette: A Man's Guide to Comfort and Confidence
Hello, WaxFam Pro. Let's talk about a service that’s rapidly growing in your booking software but still comes with a ...
-
The Ultimate 2026 Male Waxing Guide: Everything from Chest to Manzilian
Hey there, Wax Fam! Welcome to your one-stop, definitive resource on male waxing. Whether you're a curious first-time...
-
Orchid Deep Dive: Precision & Visual Feedback
Hello, WaxFam Pro. In the world of professional hair removal, the face is the most high-stakes "canvas" an estheticia...
-

Stardust Deep Dive: The Speed Waxing Champion
Hello, WaxFam Pro. If your salon's profitability is capped by the number of hours in the day, then you are facing an ...
-

Pink Pearl Deep Dive: The Brazilian Specialist
Hello, WaxFam Pro. If the Brazilian waxing service is the cornerstone of your salon's recurring revenue, then Pink Pe...
-

The Complete WaxWax Hard Wax Guide: Which Formula Is Right for Your Salon?
Hello, WaxFam Pro. Your hard wax cabinet is the operational engine of your service revenue. Stocking the right formul...
-

Pink Pearl vs. Stardust: Brazilian Specialist vs. Speed Waxing Champion
Hello, WaxFam Pro. In a high-volume studio, your choice of hard wax isn't just about color—it's about operational thr...
-

White Raw Hard Wax Deep Dive: The Universal Hero for Sensitive Skin
Hello, WaxFam Pro. In your studio, every client presents a unique canvas. While most protocols are straightforwar...
-

Raising Waxing Prices: The Risk, The Downside, and The Strategy for Estheticians (The Masterclass)
Hello, WaxFam Pro. Let’s have an honest conversation about the scariest sentence in the beauty industry: "I am raisin...
-
The 3-Day Rule: How to Switch Hard Wax Brands Without Losing Speed (The Definitive Guide)
Hello, WaxFam Pro. Let’s be honest about something nobody talks about in our industry: Estheticians are terrified of ...
-

The Ultimate Hard Wax Brand Comparison Hub (2026 Edition)
TL;DR This hub provides a scientific, data-driven comparison of leading hard wax brands based on polymer chemistry,...
-
Mermaid Wax vs. Wax Wax: Aesthetics vs. Performance
TL;DR: The Quick Verdict Mermaid Wax is the aesthetic queen—beautiful, glittery, color-changing beads that are perfe...
-
Nova Wax vs. Wax Wax: Influencer Marketing vs. Clinical Evidence
TL;DR: The Quick Verdict Nova Wax built its empire on influencer partnerships and Instagram aesthetics—beautiful bra...
-
GiGi vs. Wax Wax: Why Your Skin Deserves Better Than Drugstore Wax
TL;DR: The Quick Verdict GiGi is the mass-market king—available in every drugstore and beauty aisle—making it the de...
-
Berodin vs. Wax Wax: Professional Strength Meets Gentle Care
TL;DR: The Quick Verdict Berodin is a legendary professional brand known for its rigid polymer efficiency on coarse ...
-

Starpil vs. Wax Wax: Simplicity Over Complexity
TL;DR: The Quick Verdict Starpil is an industry giant with 50+ formulas, a massive education ecosystem, and a reputa...
-
The Professional's Guide to Leg & Arm Waxing: Techniques, Sectioning, Speed & Wax Selection
TL;DR / Executive Summary Full leg waxing and arm waxing are the highest-volume large-area services in most sal...
-
Hard Wax Cost & Profitability: The Complete Salon Analysis for 2026
TL;DR / Executive Summary Cost-per-service — not cost-per-pound — is the only metric that matters when evaluati...
-
Cirepil vs. Wax Wax: Which Hard Wax is Better for Sensitive Skin?
TL;DR: The Quick Verdict Cirepil is the traditional salon gold standard known for reliable grip on coarse hair and d...
-

Strategic Service Pricing: How to Price Your Waxing Menu for Profit
TL;DR: The Pricing Action Plan The Competitor Trap: Never base your prices solely on what the salon down the street ...
-

Pimples After Waxing: Acne vs. Histamine Reaction Guide
TL;DR: The Breakout Troubleshooting Guide Breakout Confusion: Not all bumps are acne. Distinguish between true acne ...
-

Mandatory SOPs for a Modern Waxing Salon: The Operational Checklist
TL;DR: The SOP Action Plan Consultation First: Standardize your client consultation to check for contraindications l...
-

DIY Brazilian Wax at Home: Your Expert Guide to the 4-Zone Method for Comfort
TL;DR: The DIY Brazilian Cheat Sheet The 4-Zone Method: Break the area into 4 sections (Pubis, Outer Sides, Labia, ...
-
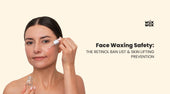
Face Waxing Safety: The Retinol Ban List & Skin Lifting Prevention
TL;DR: The Facial Waxing Safety Checklist The Golden Rule: Never wax the face if the client has used Retinoids, Tre...
-
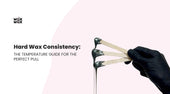
Hard Wax Consistency: The Temperature Guide for the Perfect Pull
TL;DR: The Consistency Cheat Sheet The "Thick Honey" Standard: The perfect hard wax consistency is like **thick hon...
-
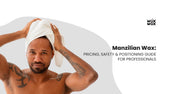
Manzilian Wax: Pricing, Safety & Positioning Guide for Professionals
TL;DR: The Manzilian Profit Cheat Sheet High-Ticket Value: The Manzilian service commands a premium price due to...
-

The Pain-Free Profit Loop: Using Hard Wax Quality to Guarantee Client Rebooks
TL;DR: The Profit Loop Cheat Sheet Retention is Revenue: Acquiring a new client costs 5x more than retaining an exi...
-

The Ultimate Hard Wax Profit Report: Using Cost-Per-Service Data to Maximize Profit
TL;DR: The Profit Cheat Sheet Time is Money: The highest cost in your salon is the Esthetician's time. A faster ser...
-

Bumps, Ingrowns & Redness: Troubleshooting Your Underarm Wax
TL;DR: The "Pit-Panic" Cheat Sheet White Bumps in the Pit (Folliculitis): These tiny pus-filled spots happen when b...
-

Underarm Waxing Aftercare: The Deodorant Dilemma & Hygiene Rules
TL;DR: The "Pit-Specific" Safety Zone The Deodorant Ban: Do NOT apply standard deodorant or antiperspirant to your ...
-
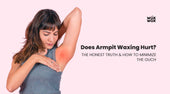
Does Armpit Waxing Hurt? The Honest Truth & How to Minimize the Ouch
TL;DR: The Pain Management Cheat Sheet The "Ouch" Scale: Yes, it stings, but it’s a 3-second sharp sensation, not a...
-

How to Wax Underarms at Home: A Step-by-Step Guide for Beginners
TL;DR: The DIY Shortcut Map Your Hair: Armpit hair grows in a chaotic swirl. You must wax in two distinct sections ...
-

The Advantages of Waxing Underarms: Why Your Hygiene Routine Needs an Upgrade
TL;DR: The "Pit-Specific" Benefits Banishes the "Pit Shadow": Waxing removes the dark root beneath the thin underar...
-

Ibuprofen Before Waxing: A Pro's Guide to Pain Management
TL;DR: The Pro Guide to Ibuprofen for Waxing Here’s the quick, responsible guide for our busy WaxFam: Does it work?...
-

How to Properly Position Clients for Waxing: The Pro-Esthetician's Guide
TL;DR: For the Busy WaxFam Pro Here’s the high-level summary of professional positioning: It's Not Just Comfort, It...
-
What Is the Best Lotion for Preventing Ingrown Hairs? A Pro's Guide
TL;DR: The Pro-Grade Solution Here’s what to look for when you're shopping for the "best" lotion: It's a "Treatment...
-

Infected Ingrown Hair vs. Pimple: How to Tell the Difference
TL;DR: What Your Bump Is Telling You Here’s the fast guide to identifying that mysterious red bump: Is it a Pimple?...
-
How to Remove a Deep, Painful Ingrown Hair (Safely)
TL;DR: What to Do About a Deep Ingrown Hair Here's the short, safe answer for our WaxFam: STOP! Put the Tweezers Do...
-

How to Exfoliate to Prevent Ingrown Hairs (The Pro Guide)
TL;DR: The Pro-Exfoliation Method Here's the quick guide to stopping ingrown hairs before they start: Why Exfoliate...


