How to Get Wax Off Skin: Your Ultimate Guide for a Clean Finish

Hey, WaxFam! Tired of wrestling with leftover stickiness after you wax? We’ve all been there, wondering if there’s a simpler path to smooth skin. In this guide, you’ll discover five powerful tricks to make your hair removal experience cleaner and more comfortable—without overusing harsh scrubbing or risky techniques. Along the way, we’ll show you why outdated soft wax is the real culprit behind messy residue and how hard wax can totally transform your at-home routine. Ready to learn a smarter way? Let’s jump in!
TL;DR:
- Soft wax leaves messy residue that’s hard to clean off, often causing skin irritation.
- Switching to hard wax can significantly reduce leftover wax and discomfort during waxing.
- Five tricks for mess-free waxing: Use natural oils, a warm compress, gentle scrubbing, invest in a hard wax kit, and get a dedicated wax pot.
- For a smoother routine: Prep skin properly, apply wax in thin layers, and follow good post-wax care to minimize irritation.
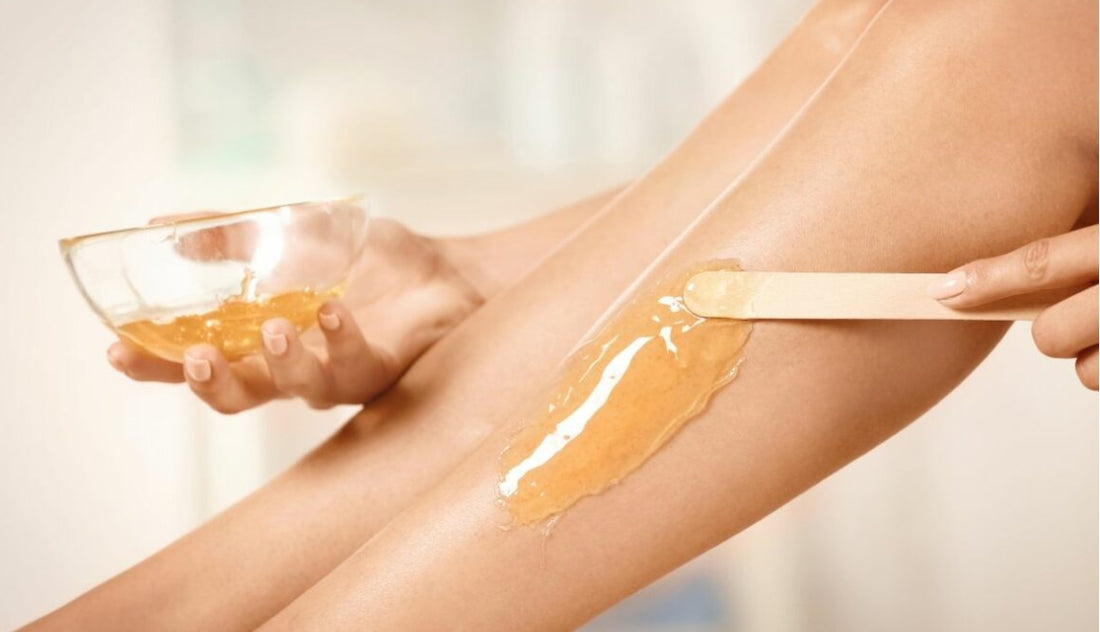
1. The Sticky Truth About Soft Wax
Before diving into solutions, it helps to understand the problem. Traditional soft wax, which is spread thinly and removed with cloth strips, often clings stubbornly to both hair and skin. That’s why some folks endlessly search for how to remove wax from skin—the soft wax formula can leave behind tacky patches that are tough to wipe away, especially if you’re new to waxing at home.
Why Soft Wax Falls Short
- Clings to Skin: It adheres firmly to the skin surface, increasing the likelihood of leftover residue.
- Increased Irritation: Because it pulls the skin along with hair, you risk redness and bumps.
- Frequent Clean-up: More mess means more time spent scrubbing or applying oils just to get rid of stray bits.
If you’re sick of scraping goo off your legs or arms, keep reading. You’re about to discover how modern hard wax solutions can save you from a never-ending sticky situation.
2. Upgrade to Hard Wax for a Smoother Experience
Where soft wax sticks to everything, hard wax bonds mainly to the hair—not the skin. Once the wax cools and hardens, you peel it off in one go, significantly cutting down on leftover residue. This simple upgrade makes a massive difference in your hair removal routine.
Benefits of Going Hard
- Less Mess: Hard wax lifts away in a single, cohesive piece, leaving little to nothing behind.
- Reduced Discomfort: By gripping just the hair, it pulls less on the skin, often resulting in less pain.
- Gentler on Sensitive Areas: Perfect for the underarms, bikini area, or face, where irritation can be a big problem.
To see why so many WaxFam regulars have switched, check out our dedicated page on hard wax. You’ll learn how a quality formula provides a cleaner, more comfortable wax every time.
3. Five Mighty Tricks for Mess-Free Waxing
Now, let’s delve into practical tips to prevent residue from forming. If you’ve ever asked friends or the internet “how to remove wax from skin” without damaging it, these five strategies are your golden ticket.
Trick #1: Use Natural Oils for Soft Wax Residue
If you’re still finishing up a batch of soft wax, keep a gentle oil—like coconut, olive, or mineral oil—on hand. After your waxing session, simply dab a bit of oil onto leftover patches. Let it sit briefly, then wipe away the loosened residue with a clean cloth.
- Why It Works: Oils help dissolve the wax without harsh rubbing.
- Bonus Tip: Products from the Pre- and Post-Waxing Care line can also be super handy. They not only clear away sticky bits but soothe sensitive skin post-wax.
Trick #2: Warm Compress & Mild Soap
Sometimes, a simple warm compress works wonders. Press a cloth soaked in warm (not hot) water onto the tacky area for a minute or two. The warmth softens any leftover wax, which you can then wash off gently with mild soap. It’s a no-fuss solution when the residue isn’t too stubborn.
Trick #3: Avoid Aggressive Scrubbing
Scrubbing freshly waxed skin is a sure route to redness and even micro-tears. If you need extra help, consider a gentle sugar scrub 24 hours after waxing, not immediately. Over-scrubbing can inflame pores and cause ingrown hairs, so keep it gentle.
Trick #4: Invest in a Hard Wax Kit
If your ultimate goal is to banish messy residue, a hard wax kit might be your best bet. These kits typically include premium hard wax beads or disks, spatulas for application, and easy-to-follow instructions. By switching to hard wax, you practically eliminate leftover residue from the start.
- Check Out: Our recommended waxing kits for a range of options that cater to beginners and pros alike.
Trick #5: Get a Dedicated Wax Pot
Ever tried to melt wax in a microwave or on the stovetop? It’s super easy to overheat or under-melt, creating clumpy wax that’s a nightmare to remove. With a proper wax pot, you can keep your wax at the ideal temperature for seamless application.
- Consistent Heat: Warm the wax to the right consistency so it grabs hair effectively.
- Faster Sessions: No more pausing to re-heat or fix patchy textures.
4. Perfecting Your At-Home Wax Routine
Even with top-notch products, technique matters. Here’s how to make your sessions hassle-free from start to finish.
Prep Smart
- Exfoliate: Light exfoliation one day before waxing removes dead skin cells, helping wax adhere to hair instead of the skin.
- Dry Thoroughly: Moisture can keep wax from gripping hair properly. Make sure your skin is clean and dry.
- Test the Temperature: Dip a small amount of wax on the inside of your wrist. If it’s too hot, let it cool before applying.
Wax Like a Pro
- Thin Layers for Hard Wax: Apply a moderately thick strip so it can harden properly.
- Firm Removal: Once the wax sets, peel it off quickly in the opposite direction of hair growth.
- Stretch the Skin: Gently taut skin can lessen the sting and help the wax remove hair cleanly.
Post-Wax Care
- Soothe Immediately: A calming gel or lotion helps close pores and minimize redness.
- Stay Cool: Skip saunas, hot showers, or sweaty workouts for at least 24 hours.
- Moisturize: Hydrated skin recovers more quickly from waxing stress.
For a more in-depth breakdown of each step, plus tips on preventing ingrown hairs, check out our full Pre- and Post-Waxing Care guide.
5. Common Pitfalls & How to Avoid Them
Whether you’re a newbie or a seasoned waxer, it’s easy to slip into bad habits. Here are a few pitfalls that might leave you Googling “How to Get Wax Off Skin” in frustration:
-
Overheating Your Wax
- Consequence: Scorching wax irritates skin and may lead to burns or persistent residue.
- Solution: Use a wax pot with adjustable temperature controls.
-
Skipping the Patch Test
- Consequence: You risk using a product that triggers skin reactions.
- Solution: Always do a small patch test on your forearm or ankle before a full session.
-
Relying on Soft Wax for Coarse Hair
- Consequence: Soft wax sticks too much to both skin and thicker hair, often leaving behind gunky bits.
- Solution: Go for hard wax on areas with coarse hair or if you’re prone to sensitivity.
-
Neglecting Aftercare
- Consequence: Prolonged redness, irritation, and possibly ingrown hairs.
- Solution: Gentle products from our pre-and-post-waxing care range can make a huge difference.

Bonus Insight: Could This Lead to a Career?
Love the art of waxing and want to take it further? Many people explore professional pathways in esthetics to turn their passion into income. If you’re curious, our guide on how to become an esthetician breaks down certification requirements, skill sets you’ll need, and what a day in the life of a waxing professional looks like.
Wrap-Up: How to Get Wax Off Skin—And Keep It Off
At the end of the day, learning How to Get Wax Off Skin isn’t about scrubbing harder; it’s about upgrading your approach. Outdated soft wax can leave behind stubborn residue and cause unnecessary irritation. The solution? Embrace the power of hard wax paired with a hard wax kit and a reliable wax pot. With the right products and a solid routine, you’ll rarely deal with leftover goop again. Dont forget to read About Vajacial 101 tips also.
Remember, WaxFam:
- Prepping and Post-Care matter more than you’d think.
- Hard Wax generally leads to cleaner, more comfortable sessions.
- Practice Makes Perfect: The more you wax, the better you’ll become at avoiding mistakes.
Now that you’ve got five mighty tricks in your toolkit—plus an understanding of why soft wax is the main culprit—you’re set to enjoy a smooth, mess-free experience every time. Here’s to never being stuck in a sticky situation again!
Related Posts
-

Waxing Client Consultation: Key Questions, Contraindications & Setting Expectations
Why the Waxing Consultation Is the Most Important Part of Your Appointment Hello, WaxFam Pro! Let's talk about the f...
-

Hard Wax Cost, Profitability & Client Retention: The Ultimate Master Guide for Waxing Salons
Hello, WaxFam Pro! Let's have the conversation that most waxing educators skip: the one about money. Specifically, ab...
-

Waxing Salon Marketing Strategy: How to Attract, Convert & Retain Clients in 2026
Rewritten from: _blogs_waxing_101_top_10_faq_on_waxing_franchise_o.md (DIFFERENTIATE → Node 19: Marketing Waxing Ser...
-

Folliculitis vs. Ingrown Hairs Post-Waxing: The Complete Prevention & Treatment Guide
Hello, WaxFam. The bump appeared 36 hours after the wax. Your client is staring at it in the mirror, concerned, and n...
-
The Science of Male Skin: Why Your Waxing Technique Must Be Different
Hello, WaxFam Pro. Let's cut to the chase: waxing male clients isn't just a "men's version" of a female service. It's...
-

Starpil vs. Wax Wax: Simplicity Over Complexity
TL;DR: The Quick Verdict Starpil is an industry giant with 50+ formulas, a massive education ecosystem, and a reputa...


